Clone Your Favorite Plants: Build a Home Tissue Culture Lab


Introduction
We all know "tissue culture" is a buzzword in plant propagation, but what truly sets it apart?
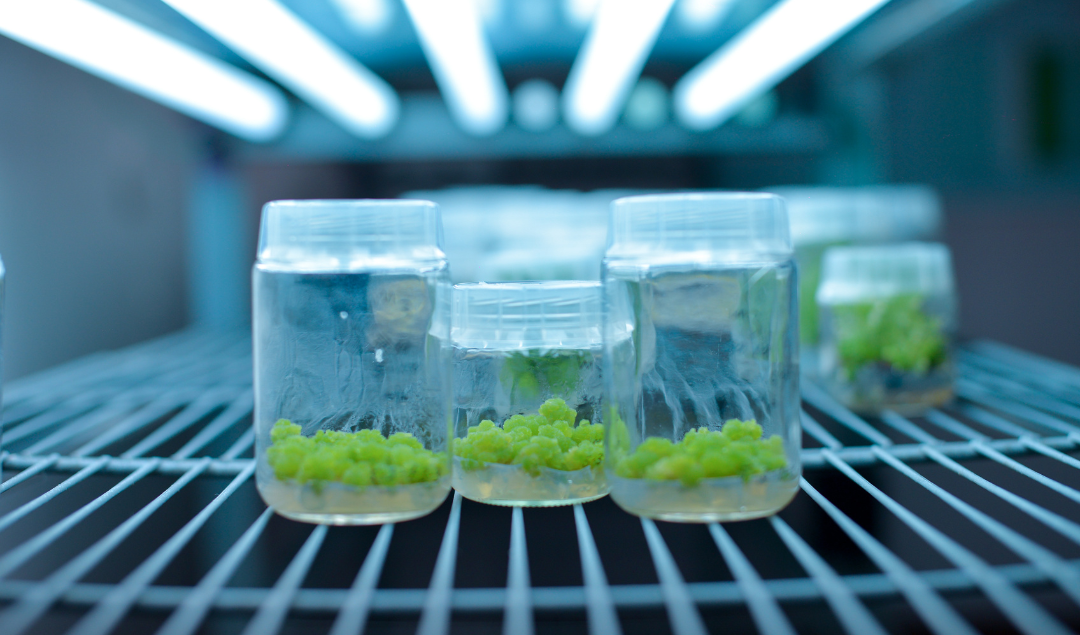
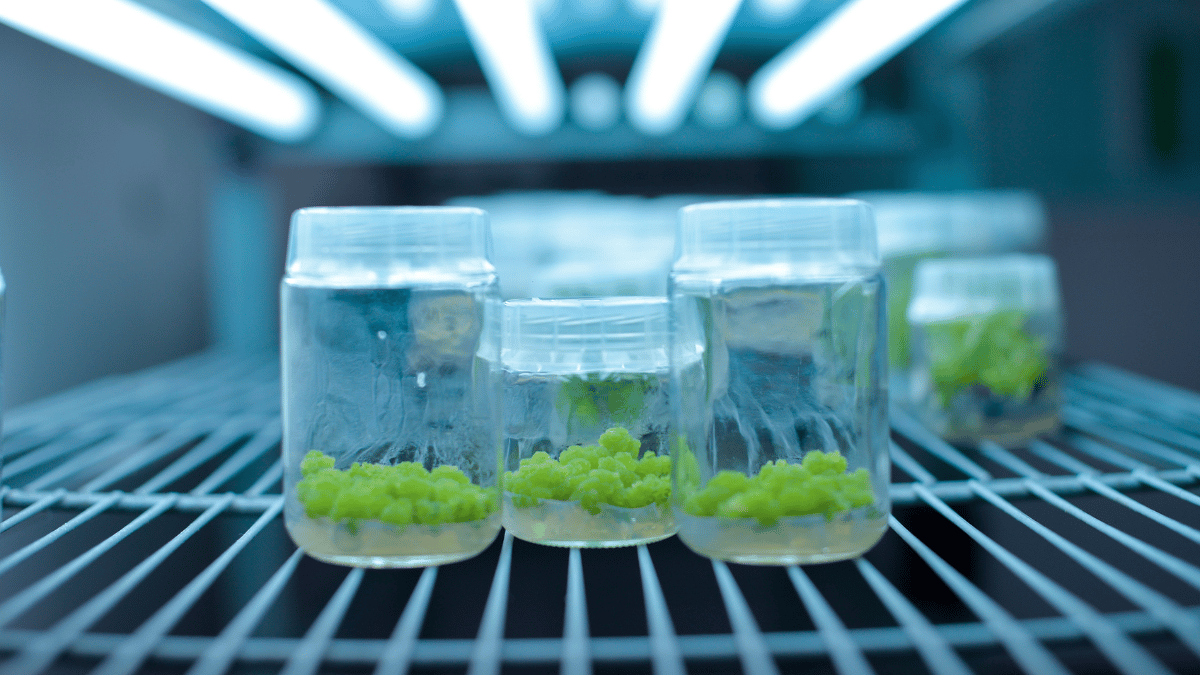
This innovative technique allows researchers and growers to cultivate entire plants from just a tiny piece of tissue. Gone are the days of waiting for your plant to reach a specific stage! Simply take a tissue sample, introduce it to a nutrient-rich medium, and within weeks you'll witness new growth.
Yes, the latest trend in plant propagation is tissue culture, because waiting for seeds is so last season.
The real magic lies in the sheer multiplication potential. Imagine the abundance of plants you can create from a single "parent" plant using tissue culture, making it a valuable tool for conservation, research, and even commercial production.
Additionally, because the technique is performed in a sterile environment, obtained plants are free of disease and pests.
Yes, maintaining a sterile environment is the most crucial aspect of tissue culture. Whatever chemicals, tools, equipment, and even explant you use in the process, they should be completely sterilized. The plant tissue that you use for the culturing process should be from a healthy plant source.
How is it possible that a whole plant can be grown using just a few tissues?
The answer lies in a remarkable property of plant cells called totipotency. This incredible ability allows any plant cell to divide and differentiate into a complete plant, similar to how stem cells in humans can become various specialized cell types.
So, now you dream of having a miniature plant laboratory in your own home? Then, I am here to help! In this article, we are going to learn more about doing tissue culture at home, the benefits of the technique that you can enjoy, and resources to refer to whenever in trouble!

Transforming Your Home Into Mini Plant Lab
To build a plant tissue culture home lab, the first thing you will need is a dedicated clean room to perform the experiments. Sterilize the room meticulously using appropriate disinfectants.
Then to get started with the process, here are the three categories of the things that you will need:
- Specialized equipment: A laminar flow hood, autoclave, growth chamber, and specific tools for handling sterile materials.
- Tools and other supplies: Face mask, Bleach, Saucepan, Rubbing alcohol, Aluminum foil, Glass jars with lids, Dish soap, Razor blade, and Long-handled tweezers.
- Knowledge of aseptic technique: Maintaining a sterile environment to prevent contamination is crucial.
- Understanding plant physiology and tissue culture principles: Choosing the right type of plant tissue, preparing the media, and manipulating environmental factors are essential for success.
Preparing Tissue Culture Media
We understand that budget can be a barrier to entering tissue culture. But what if we told you readily available ingredients like table sugar and vitamin tablets could contribute to a nutrient solution for your in vitro plants?
It's true! For home-based tissue culture enthusiasts, substituting certain components with accessible alternatives can revolutionize your approach.
Bonus Tip for Beginners: Start with easily obtainable plants for which tissue culture protocols are readily available online, such as African Violet. This significantly increases your chances of success.

Materials needed to prepare 1L media:
All-purpose soluble fertilizer, table sugar (30 grams), 1/8 cup of table sugar, 1 cup of tap water, 1 cup of all-purpose soluble fertilizer from stock solution, ½ crushed tablet of 250mg inositol, ¼ crushed tablet of vitamin with thiamine, and 2 tablespoons of agar flakes (if powder, use 8 grams of agar per liter of the media).
Follow the given instructions to prepare a tissue culture media (the given protocol is taken from a illinois.edu) for your plant:
- Wash your hands thoroughly and wear a face mask to minimize contamination risks.
- Thoroughly wash all glassware with a 10% bleach solution for proper hygiene.
- Combine the medium ingredients in a clean saucepan. Bring it to a boil for 2-5 minutes while stirring continuously, ensuring complete agar dissolution.
- While the medium boils, spray glassware and foil with rubbing alcohol and allow it to evaporate.
- Check the pH of the media.
- Carefully pour the sterilized medium into the sterilized glass containers and cover them securely with foil.
- Fill a separate jar with tap water (the best recommendation is to use distilled water) and cover with foil.
- Place all containers (including the water-filled jar) in a pressure cooker with a water bath. Sterilize at 15 psi for 15 minutes.
- While the containers are sterilized, disinfect your work area with a 10% bleach solution. Additionally, spray the jars and lids with rubbing alcohol for further assurance.
- Carefully release pressure from the cooker and use hot pads to safely remove the containers.
- Fill sterilized jars with sterile medium, cover with lids, and place in the refrigerator overnight or until used.
- Refrigerate the sterile water until use.

Now Get Your Explants (Plants Tissues) Ready
- Thoroughly sanitize your work area and hands with rubbing alcohol to minimize contamination. (Use Plant Preservative Mixture (PPM™) to prevent contamination in your labs. Contamination is basically the attack of microbes or tiny organisms on your cultures, leading to the loss of plants. Thus maintaining a sterile environment is important and PPM™ can be your savior in tackling this problem)
- Sterilize all equipment (e.g., tweezers, razor blades) and the plant material itself to eliminate bacterial growth.
- Wrap the tweezers and razor blades in aluminum foil, creating tool packets for easier handling and maintaining sterility.
- Sterilize the tool packets by boiling them in water or using the pressure cooker to eliminate pathogens. Allow them to cool before use.
- In a container with a lid, prepare a 10% bleach solution by combining 450 ml of sterile water with 50 ml of bleach.
- Add 3-5 drops of dish soap to the solution. The soap helps prevent debris from clinging to the plant material.
- Submerge the plant pieces in the bleach solution and swirl the container gently for 15 minutes.
- Carefully discard the bleach solution and refill the container with sterile water. Swirl again to rinse the plant material.
- Repeat the rinsing process four times to thoroughly remove bleach residue.
- Avoid breathing on the plant material or touching it with unsterilized hands to prevent contamination.
- Using the sterile razor blade, carefully trim off any bleach-affected edges from the plant material.
- Cut the plant material into smaller segments as needed. Discard any discarded edge pieces.
Time To Transfer Your Plants To The Prepared Nutrients Media
- Remove the sterilized medium from the refrigerator, ensuring it remains at a cool temperature.
- Carefully place the sterilized plant segments onto the surface of the medium.
- For leaf pieces, gently push them down slightly to ensure good contact.
- For stem pieces, push them halfway into the medium for optimal exposure. This maximizes the surface area in contact with the nutrients.
- Securely place the lid on the jar containing the plant material and medium. Label the jar with the date of inoculation (planting) for future reference.
- Place the labeled jars in a room maintained at a constant temperature of 75°F (23.9°C). Additionally, ensure they receive light for approximately 16 hours per day. Cooler temperatures will result in slower plant growth.
- Regularly monitor the cultures for any signs of fungal growth. If fungus appears and starts attacking the plant material, unfortunately, you will need to discard the entire contents to prevent further contamination.
- Once the new plantlets (young plants) outgrow the initial container, it's time to transfer them to a new container with a fresh medium. This step initiates the acclimatization process, gradually introducing them to their final environment outside the sterile culture (ex vitro).
Plant Tissue Culture Is Not Only Limited to The “Multiplication” of Plants
While plant tissue culture (PTC) is often recognized for its ability to rapidly multiply desirable plants, its potential extends far beyond simple reproduction. This innovative technology opens doors to a variety of applications, each playing a crucial role in advancing plant science and horticulture.
Here's a glimpse into the diverse possibilities beyond multiplication:
Disease elimination: PTC allows scientists to eliminate viruses (through meristem culture) and other pathogens from plant material, ensuring the production of disease-free plants. This safeguards crops from potential devastation and contributes to healthier and more resilient agricultural systems.
Conservation and preservation: Rare and endangered plant species can be preserved and propagated through PTC, aiding efforts to conserve biodiversity and ensuring the survival of these valuable resources.
Genetic modification: PTC provides a platform for introducing desired genetic traits into plants, improving characteristics like pest resistance, enhanced nutrition, or altered flowering times. This opens doors for sustainable agricultural practices and food security.
Production of secondary metabolites: Certain plants produce valuable secondary metabolites used in pharmaceutical and medicinal applications. PTC allows for the efficient production of these valuable compounds, contributing to advancements in healthcare and drug discovery.
The versatility of plant tissue culture goes beyond this list, continuously evolving and offering new possibilities in the world of plant science.

What Can You Do of Tissue Culture Grown Plants?
Once your tissue culture plants are successfully grown and acclimatized, they offer numerous benefits for your business:
Increased production: Tissue culture allows you to rapidly multiply desirable plant varieties, enabling you to meet higher market demands and generate larger profits.
Improved quality: Tissue culture plants are often disease-free and genetically uniform, leading to higher quality and consistency in your product compared to traditionally propagated plants.
Reduced costs: While initial setup costs can be high, over time, the reduced risk of disease and increased efficiency of production can lead to cost savings compared to traditional propagation methods.
Access to rare varieties: Tissue culture allows you to propagate rare and valuable plant species, potentially creating a niche market for your business and increasing its market value.
Faster time to market: By rapidly multiplying desirable plants, you can introduce new varieties to the market faster, giving you a competitive edge.
Plant Cell Technology: Your Partner In Plant Tissue Culture
Are you passionate about plants and fascinated by the potential of plant tissue culture? Plant Cell Technology understands your aspirations and is here to be your trusted partner in building a thriving home lab.
We recognize that setting up a home lab and mastering the intricacies of plant tissue culture can be challenging. However, with the right tools, knowledge, and support, you can cultivate success and unlock a world of possibilities.
How Plant Cell Technology Empowers You:
- Essential Supplies: Access a comprehensive range of high-quality media, agar, gelling agents, culture vessels, and more, ensuring you have the right tools for every step.
- Expert Knowledge: Gain confidence through our informative resources:
- Comprehensive blog articles: Explore topics from basic principles to advanced techniques.
- Master Classes: Immerse yourself in in-depth sessions led by experienced instructors, gaining valuable hands-on experience and mastering advanced techniques.
- Consultation Services: Get personalized advice and tailored solutions from our experts, ensuring your home lab journey flourishes.
- Community Connection: Join our vibrant community forum to connect with fellow enthusiasts, share experiences, and stay updated on the latest advancements.
Blog Categories
View by Level
Popular Blogs
Callus Culture: Definition and Applications
Introduction Tissue culture is not just one technique! Yes, you heard right! As you know, tissue culture is an advanced...
Read More
6 Plant Tissue Culture Books to Keep Learning
Introduction Most of us are fans of books when it comes to learning a topic in detail and in a...
Read MoreFollow Us On Social


Follow Us On Social
Join the conversation
Your email address will not be published. Required fields are marked